
I’ve realised I have something of a problem. I simply don’t have enough space. Motorcycles take up a lot of it, so I have evolved this set of rules to help me address the situation.
- Use the thrill of buying a new project to get it built ASAP. Don’t gather projects for ‘when you retire’, as you may no longer have the energy.
- Sell bikes you no longer use or enjoy. Regrets come when you’re forced to sell, not when you choose to.
- Avoid having too many bikes that fulfil the same purpose. I used to have more café racers than local cafes to race to…
- Every bike must have a purpose – even if it only gets used once a year but keep them all ‘ready to go’.
After buying my Rudge project, I tore straight into it and got it finished in a few months. Rule 1: Tick. I don’t have anything I no longer enjoy riding. Rule 2: Tick. This is easy... but hang on, the Rudge is a mid-’30s sports single, like my Norton and Sunbeam. Not doing so well with Rule 3 are we? Maybe we should revisit Rule 2... Well, I can’t justify all three; the Rudge is great fun and the Norton is irreplaceable... but what about the Sunbeam – the rear stand is irritatingly awkward and I can’t get a side stand to fit the bike. Hmmmm...
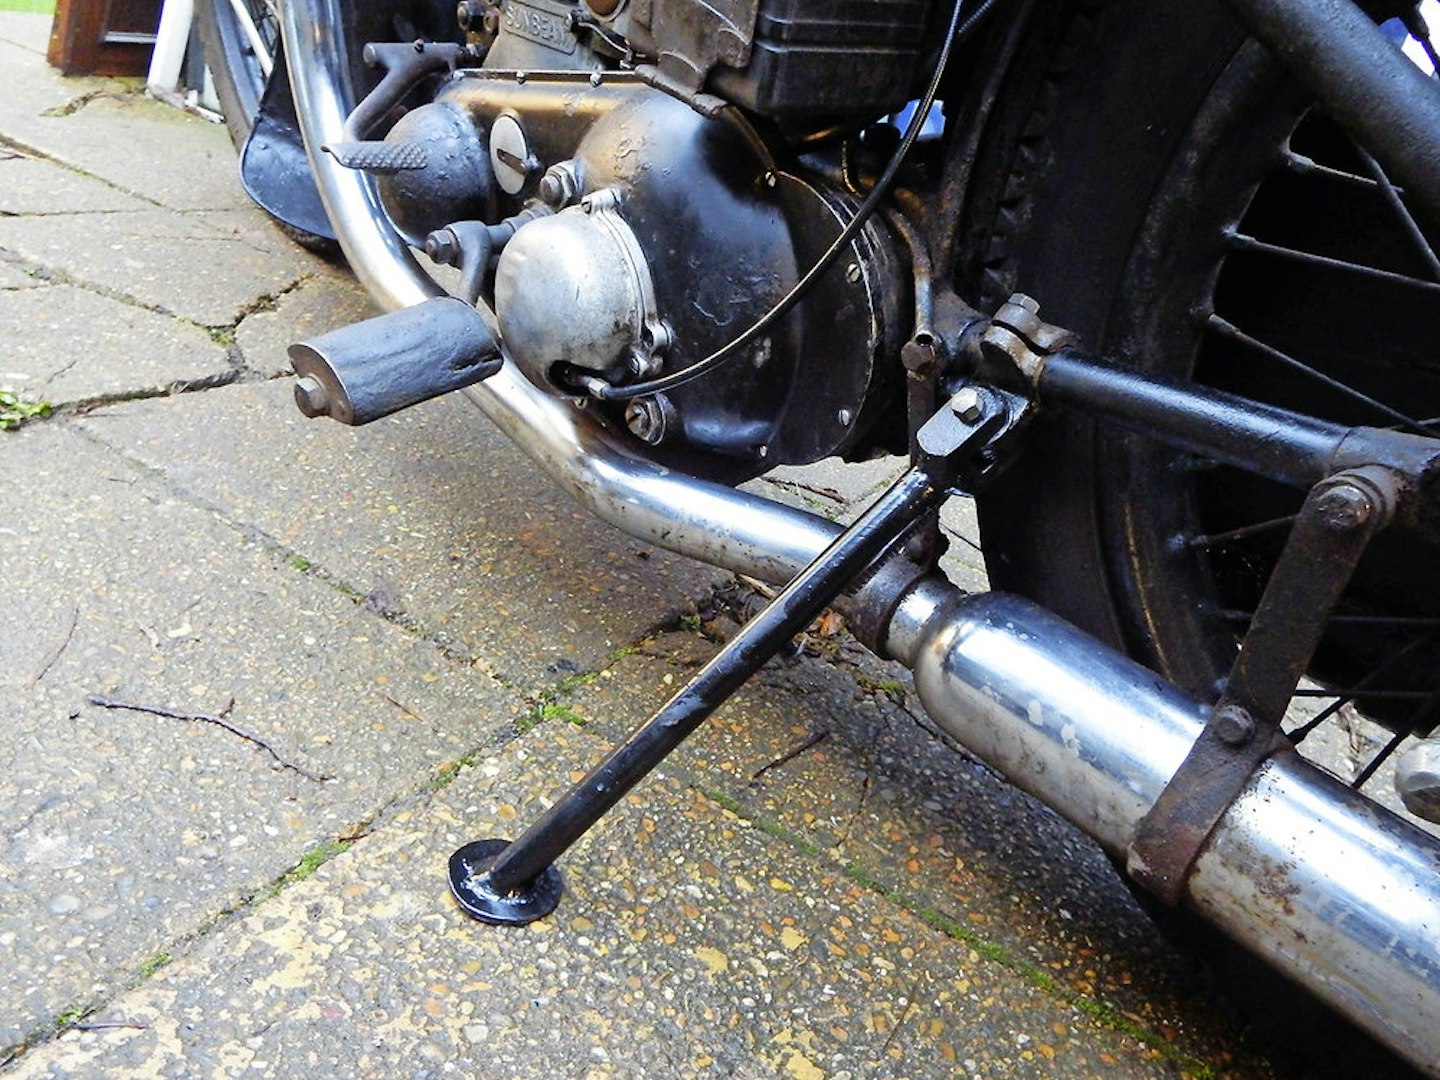
Rule 4 saw me go through the bikes that needed jobs done for this year – and when the Sunbeam went on the bench, I honestly believed I was doing a pre-sale spruce up. Looks nice with a polish, lovely original paint... we’ve done a lot of miles together, haven’t we old girl? Actually, while it’s on the bench, maybe I could make a side stand... The stand’s a great success – apart from giving me the excuse to keep the Sunbeam, along with all the others. Rules are all very well, but when they concern matters of the heart maybe it’s better to consider them as ‘guidelines’. Oh well, better do some tidying up; it’s the only way I’ll get any more space.
THE BIG FIX
TWIN QUERIES
RICK ADDRESSES A PAIR OF COMMON ISSUES FOR BRIT BIKES: TANK SEALING AND WET SUMPING
Martin Boote seeks advice about the 1970 BSA A65 he’s been offered. First, he says the tank has been sealed and although it isn’t leaking yet, the sealer is flaking off inside. He asks how to remove it in order to do the job again. Second, the owner reports that the bike wet sumps, despite the oil pump having been reconditioned. Would I recommend an anti-sumping valve? Some older sealers apparently dissolve in acetone. More recent types like ‘Slosh’ require MEK (Methyl Ethyl Keytone) also known as Butanone; both solvents can be bought in quantity online and I’d try dissolving a flake of the old sealer in a jar before filling the whole tank with possibly the wrong stuff.
The solvent will probably be very destructive to paint and may attack any plastic parts in the taps too; BSP threaded plugs or corks might be best but make sure no solvent can seep out and attack the paint. Ethanol in petrol has made the lifespan of any sealer unpredictable anyway and I prefer to repair leaks by brazing or soldering – as I did on the Norvin tank (CB February). Wet-sumping is the inevitable result of leaving dry sump bikes standing for long periods. A tap is the most effective solution – but potentially also the most disastrous. Antiwet- sumping valves rely on the oil pump overcoming a ball held closed by a light spring. Many see this as an undesirable restriction that will lead to oil starvation. Probably the safest alternative is to fit one of SRM’s (01970 627771) improved sump plates with a drain bolt. For just over £50 this allows you to easily drain the excess oil into a clean jar and pour it back into the tank. Norton owners can get an easy-drain sump plug from Norvil (01543 278008).
TOP TIPS
TOUGHENING UP SPRINGS AND FINBAR FEEDBACK
Temper, temper...
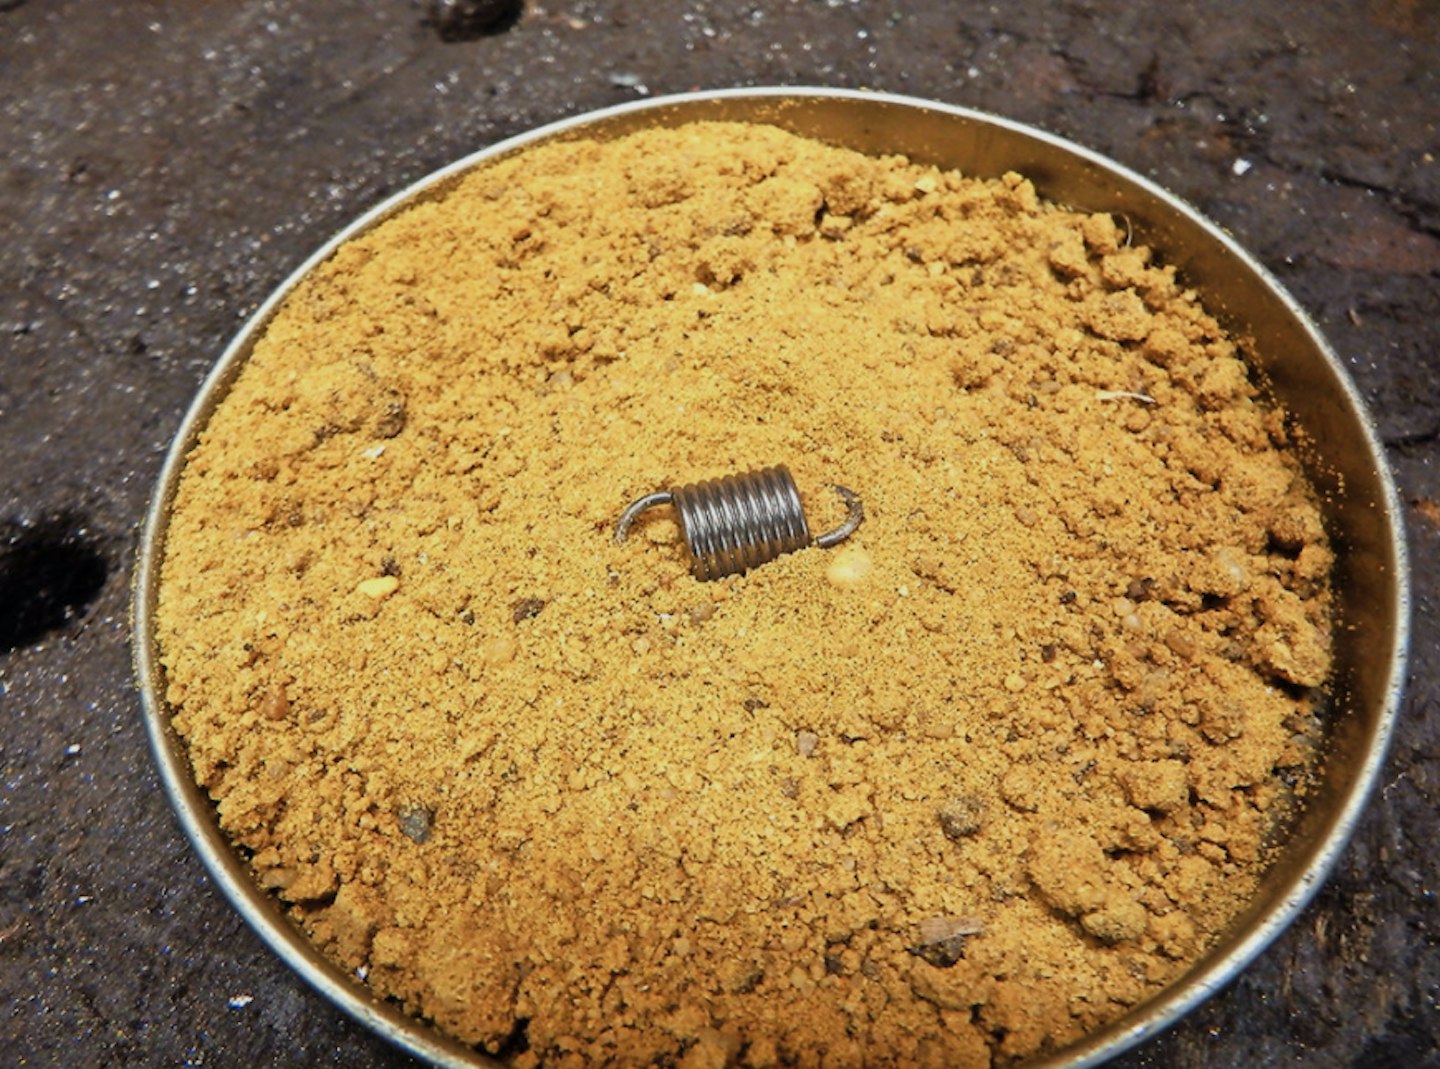
Gordon Williams suggests a way of tempering fine springs and other small parts uniformly. The trick to immerse the part in a tray of sand, leaving a small area visible to reveal the colour (temperature) change. The tray is then heated until the part reaches the correct colour for quenching. Hot sand heats small objects such as fine springs controllably.
Finbar update
I’d like to take this opportunity to thank everybody who has sent in messages of condolence for the loss of Finbar – and particularly to everyone who has contributed to the ‘Pets as Therapy’ donation site I set up in his memory (justgiving.com/fundraising/ Finbar-ClassicBikeWorkshop). I’m delighted to say that, as I write, just under £500 has been collected. Many thanks. For more silly pictures of the late, lamented, shed-terrier visit rickparkington.com and go to the section headed ‘Finbar McPaw’. Thanks for the many kind donations in Finbar’s memory
FLOAT LIKE A...
Spike emails to say that, after pinning down tick-over trouble on his Triumph Thunderbird to a blocked pilot system in the Amal MkI Concentric carb, he swapped the internals into a different body and everything was fine – except that now it choked up at high speed. “Surely a different – but same size – body shouldn’t need different main jet?” he asks. The only other clue is that if he runs the engine with the fuel turned off, the engine speed increases. It’s not that unusual for revs to rise as the fuel level drops, but it could imply that the float height is wrong in the new body. It’s set by how far the valve is pressed into the float bowl – so if Spike replaced the bowl as well as the body, that could be it.
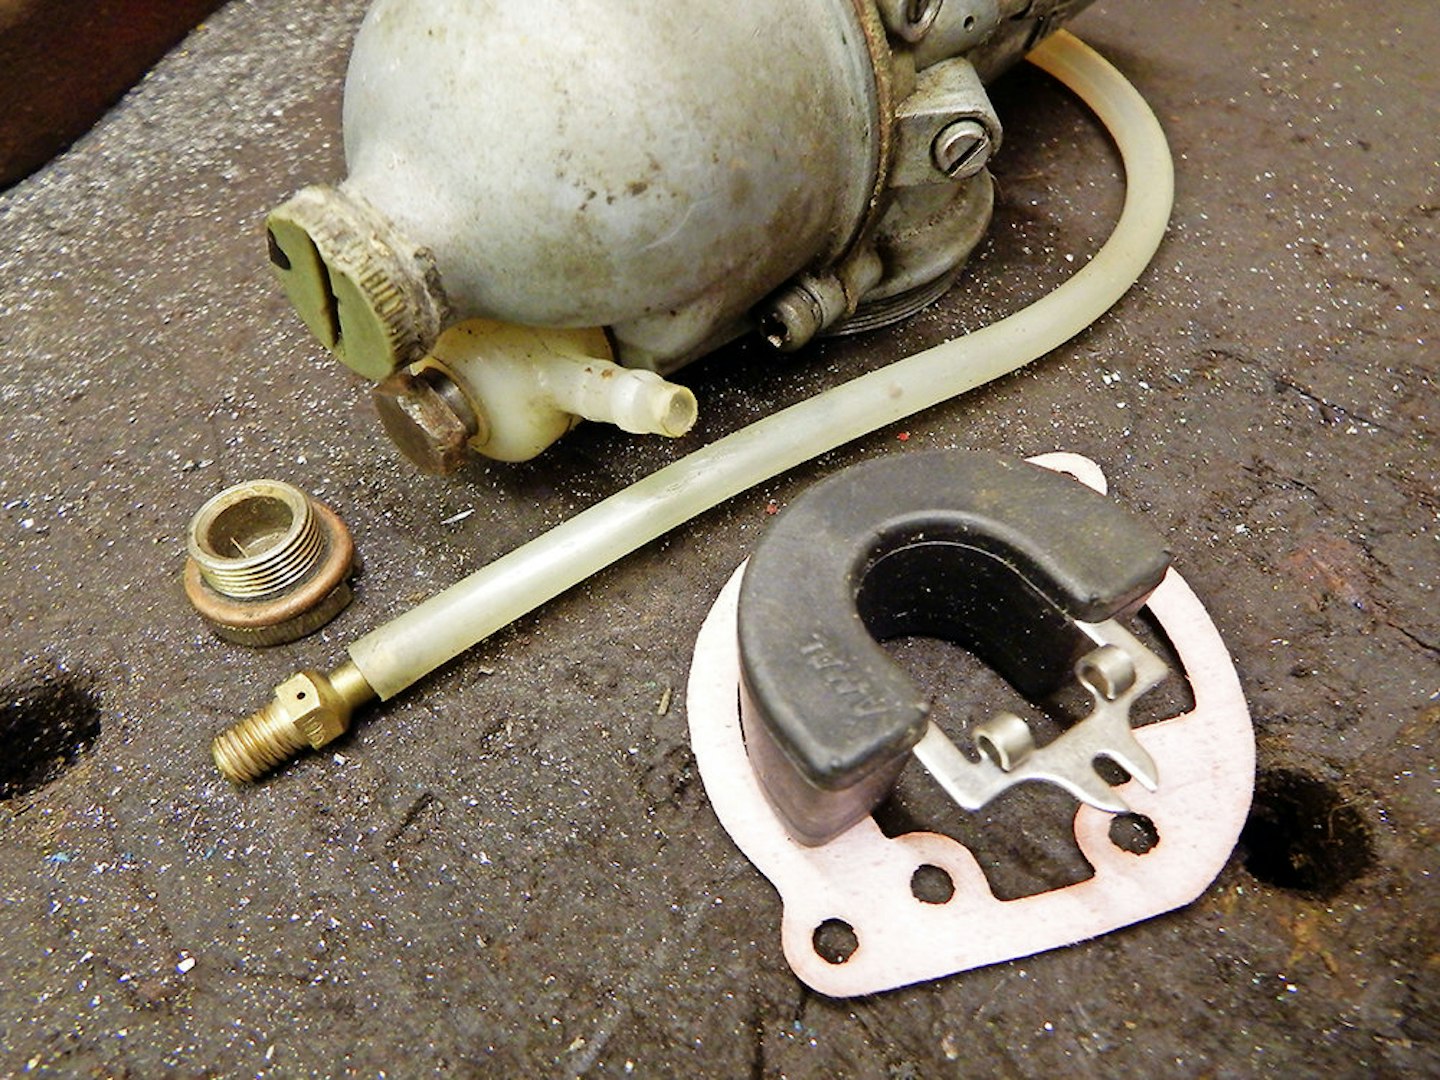
With the needle seated in the jet, the float should sit so it is just above the gasket face of the float bowl. The actual level of petrol in the bowl should be 0.210in, give or take 40 thou (ie between 0.170 and 0.250in) below the top of the float bowl with the gasket fitted – which presumably means the gasket is included in the measurement. You can do this by rigging up a standpipe. To do this you need the type of bowl with a drain plug and a spare plug you can drill and tap for a pipe fitting – an old needle jet is ideal. A clear plastic pipe (battery breather is good for this) attached to the fitting and taped up the side of the carb will echo the level inside, so it can then be measured with the carb assembled. The old plastic floats are not easy to adjust. You can try bending the tabs that hold the needle – they tend to spring back, but it may work if you dip them in boiling water. Alternatively, a new ethanol-resistant stay-up float from Burlen Fuel systems is a good idea, these have metal tabs that can be bent to suit and cost a pretty reasonable £12.98.
SILENCER STRUGGLE
Ken Turnock says his 1983 Yamaha XS1100S downpipes are still in good condition, but the silencers are showing their age. “New ones are unobtainable,” he says. “Should I get the old ones refurbished and coated black or might FJ1100 or 1200 ones fit?” ‘Interchangeability’ is not a word that springs to mind with Japanese bikes and a quick call to exhaust specialist Motad ascertained that the later FJ model silencers don’t fit and also that Motad no longer make a system of their own for the big XS. But in any case, aftermarket exhausts were generally deliberately different to standard systems. If it were me, I’d take a look at the FJ silencers; perhaps they could be modified to fit, with alterations to brackets or the pipe inlet, although it should be borne in mind that even if a silencer from another model could be adapted, there’s a chance that the carburation could be affected. So I think Ken’s best course is to investigate reconditioning his originals first.
GEARING UP
Tom Halls got in touch via my website (rickparkington.co.uk) to say that his BSA Golden Flash seems ‘revvy’ and would fitting a two-teeth smaller or so rear sprocket sort it out? Well, probably it would, but I don’t think smaller sprockets are available, Tom. On pre-unit (separate gearbox) bikes like the BSA A10, gearing is changed by altering the size of the crankshaft sprocket as it’s the easiest one to get to. There are four sprockets in all – crankshaft and clutch, gearbox and rear wheel – and increasing the size of the crank or gearbox sprockets is the same as reducing the clutch or rear wheel. Given that the ratio between both fronts and rears is about 2:1, adding one tooth to the crank is the same as two less on the rear wheel.
Standard solo gearing for an A10 is engine: 21 teeth, clutch: 43t, gearbox: 19t and rear wheel: 42t. Engine sprockets down to 18 were supplied for sidecar use and up to 23t for the Rocket Gold Star, so there’s a good selection available – bear in mind you may need a longer chain too. The earlier plunger-framed, semi-unit construction models have the engine and box bolted together and used a duplex primary chain, for which optional sprockets are not available. Standard sizes here 27/54 (smaller chain pitch, so smaller teeth) and 19/42 although a 49t rear sprocket was listed for sidecar use. The generous torque of the A10 made it a very popular sidecar bike, so it’s quite possible that Tom’s BSA has been geared for pulling a chair.
HOW TO GET YOUR HORN HONKING AGAIN
WHEN IT ALL GOES QUIET, THERE ARE A FEW WAYS TO GET YOUR AURAL WARNING DEVICE WORKING AGAIN...
- Most horns work by earthing to the handlebar via the button, so the wire from horn to button should be live. Connecting a meter to the button wire, this one isn’t.
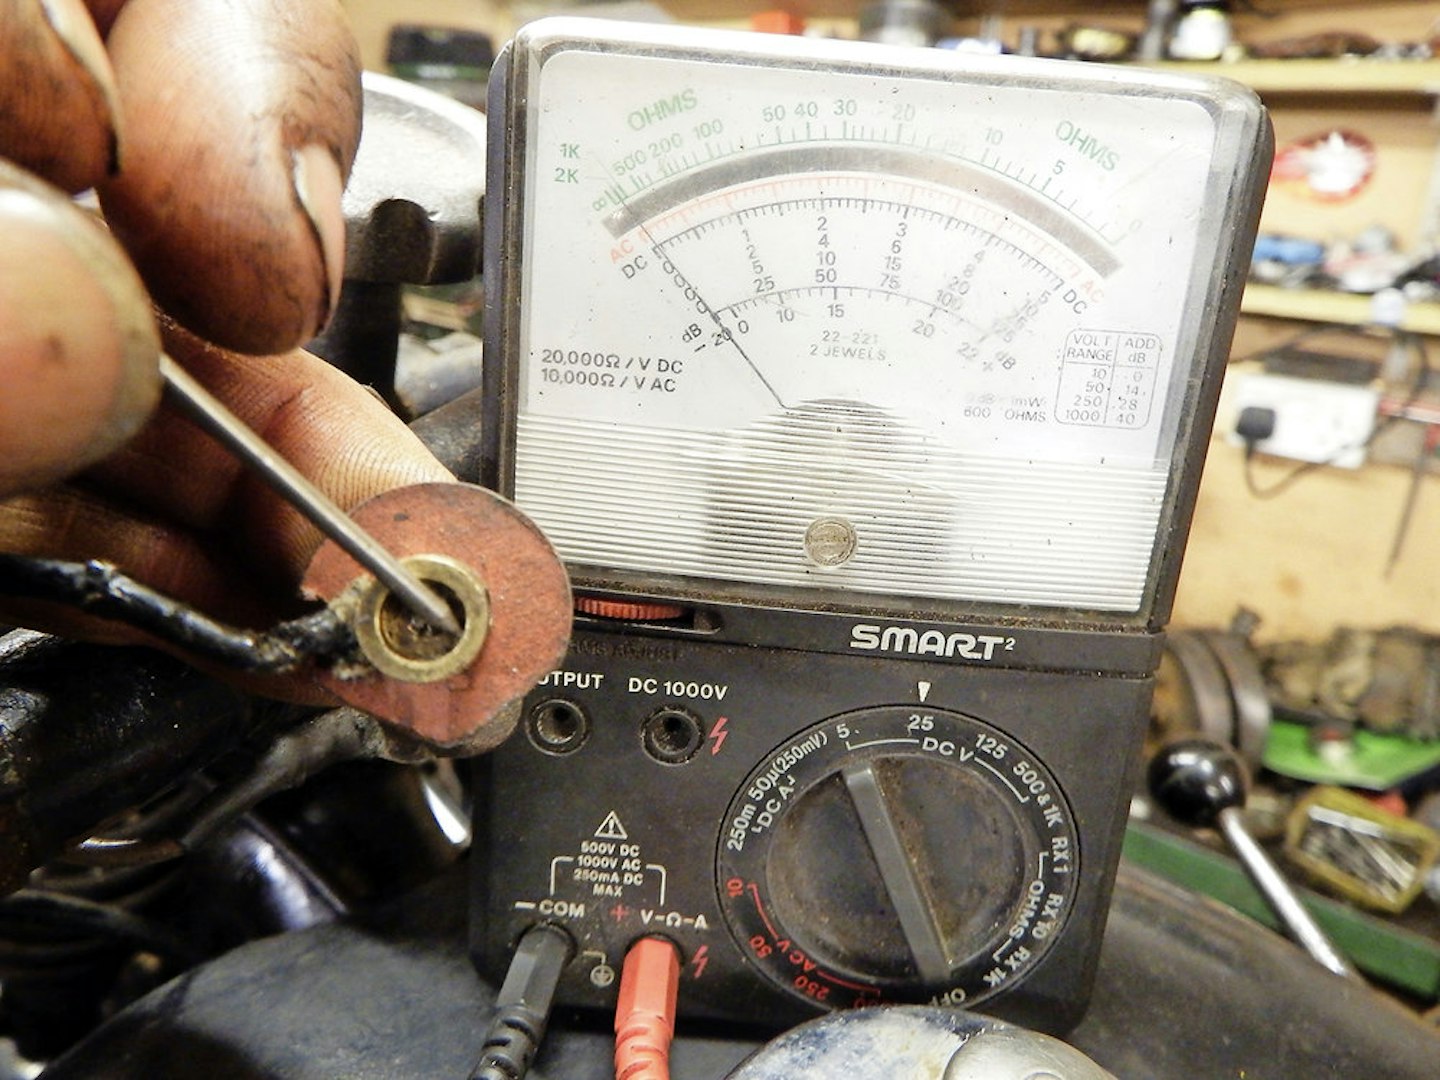
- While the meter’s out, set to resistance (ohms) and check the handlebar is a good earth. Often they are not – especially when rubber-mounted. But we’re OK here.
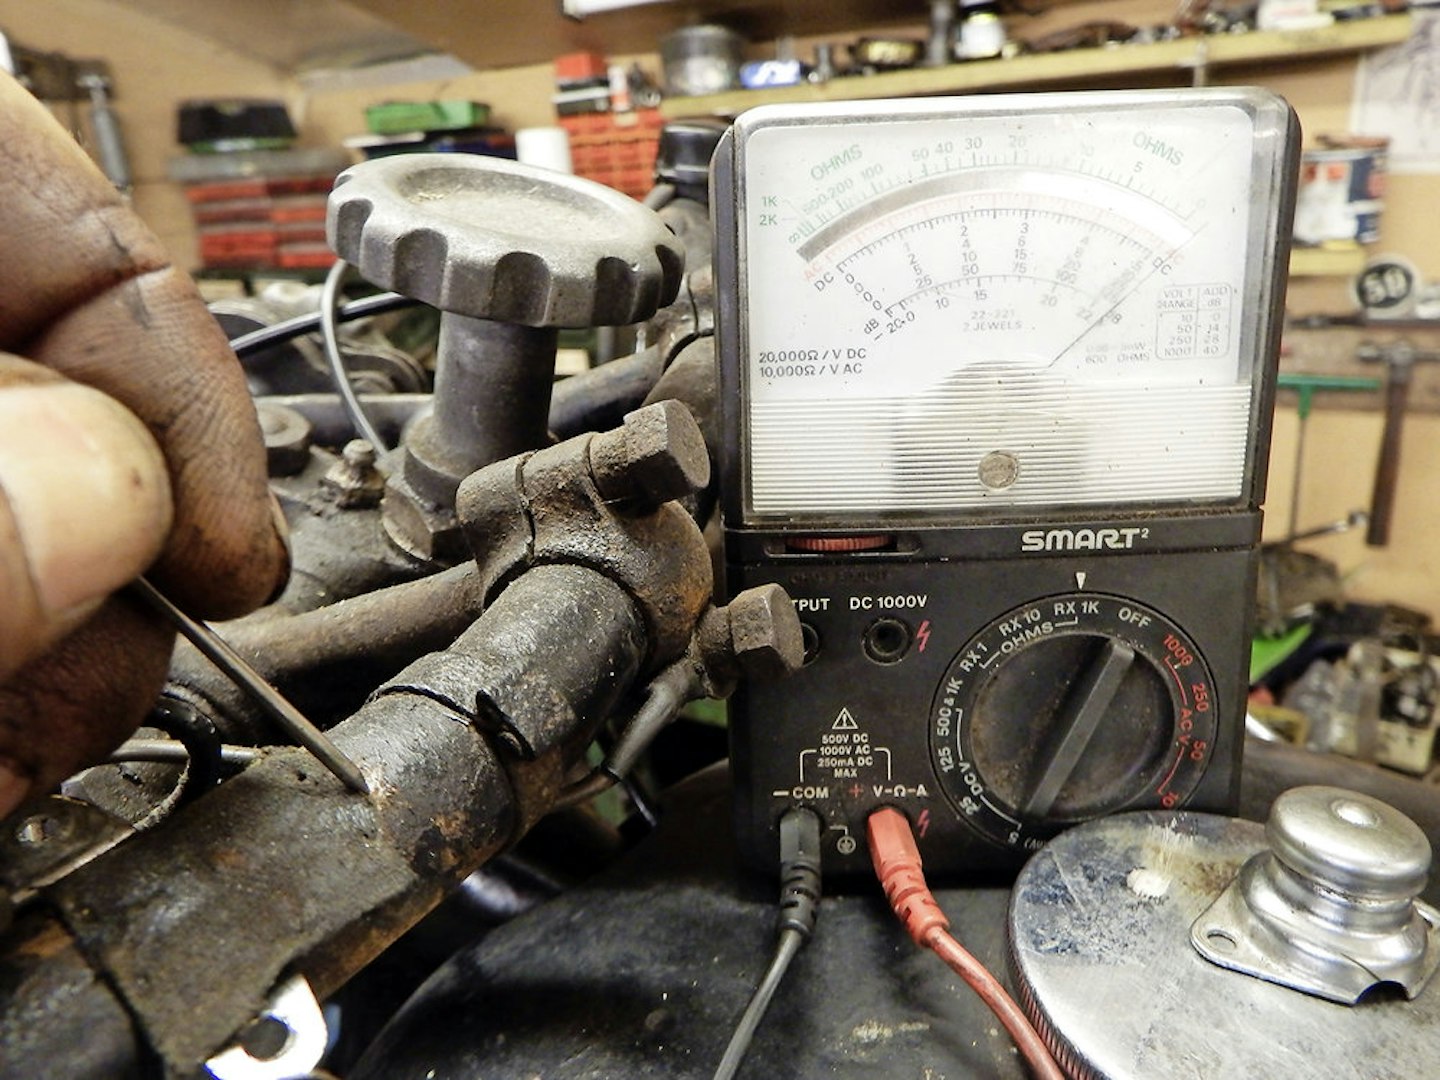
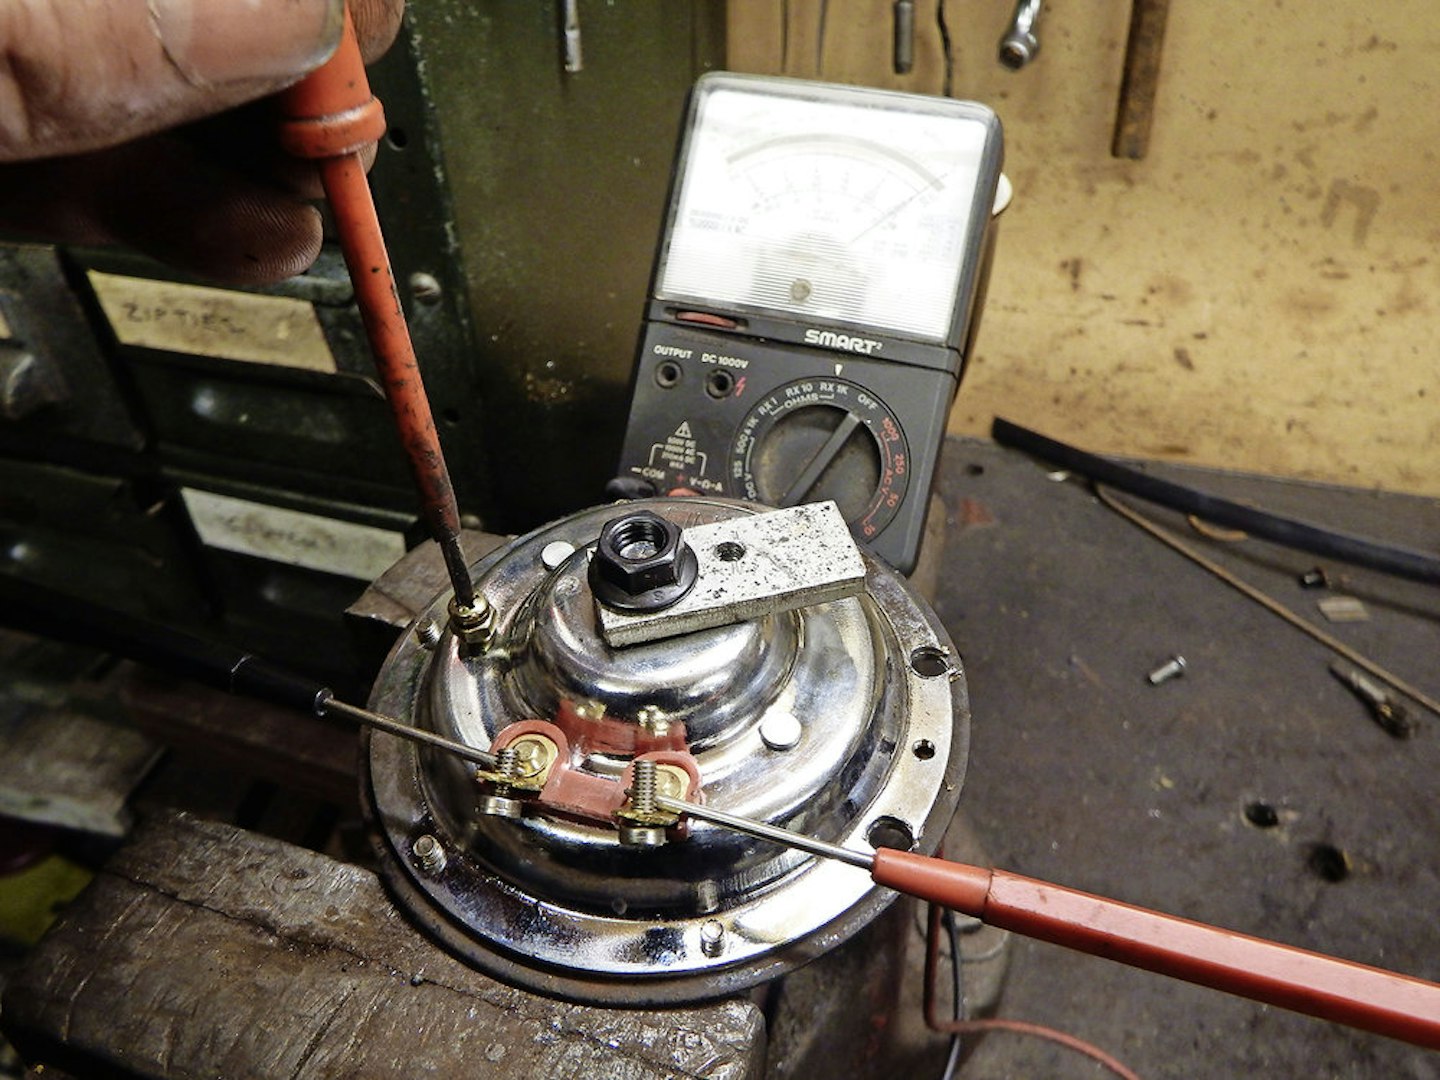
- Power is going into the horn and not coming out, but that doesn’t mean it’s broken. Horns have a set of contact points inside – on an old horn they made need cleaning...

- But here, adjustment is more likely. With the resistance meter across the terminals, back the screw off until the needle swings. Then check it on a battery – wearing ear plugs!
WHAT’S IN A NAME?
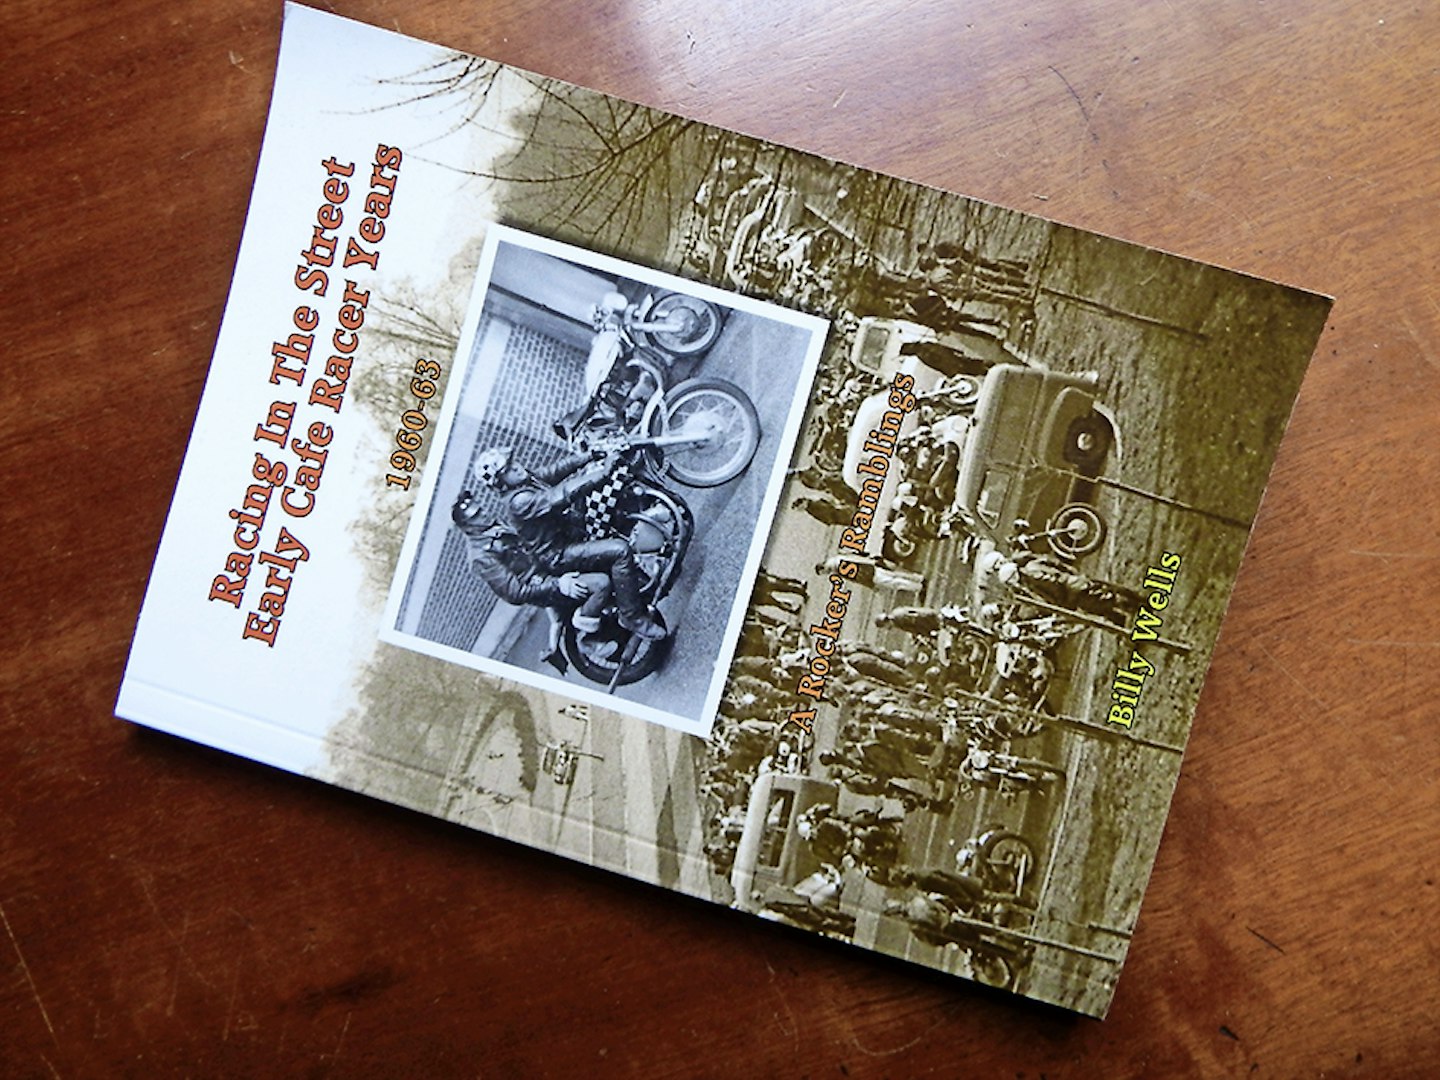
Roger Fairclough says: “Back in the late ’50s/early ’60s, if you built a bike using a Triumph engine and a Norton frame it was called a Triton. If it was a Triumph engine in a BSA frame it was a TriBSA and if you shoe-horned a Vincent into a Norton it was a Vinton (ie the engine came first). So where and when did it become a Norvin?” Interesting question Roger, but surely there are no rules in special building! I think ‘engine first’ is just coincidence. I have seen Ariel/Nortons labelled ‘Arton’ or ‘Noriel’. Besides John Willers’ legendary Featherbed Vincent had Vin- Nor painted on the tank. So I guess anything goes. Speaking of John Willers, anyone with an interest in the ton-up years will enjoy Billy Well’s book Racing in the Street, Early Café Racer Years (£10 from Amazon). John Willers was one of Billy’s crowd in the early ’60s and the book makes very enjoyable reading for those who were there – or, like me, just wish they had been.
RICK’S PATCH
SEIZING THE OPPORTUNITY
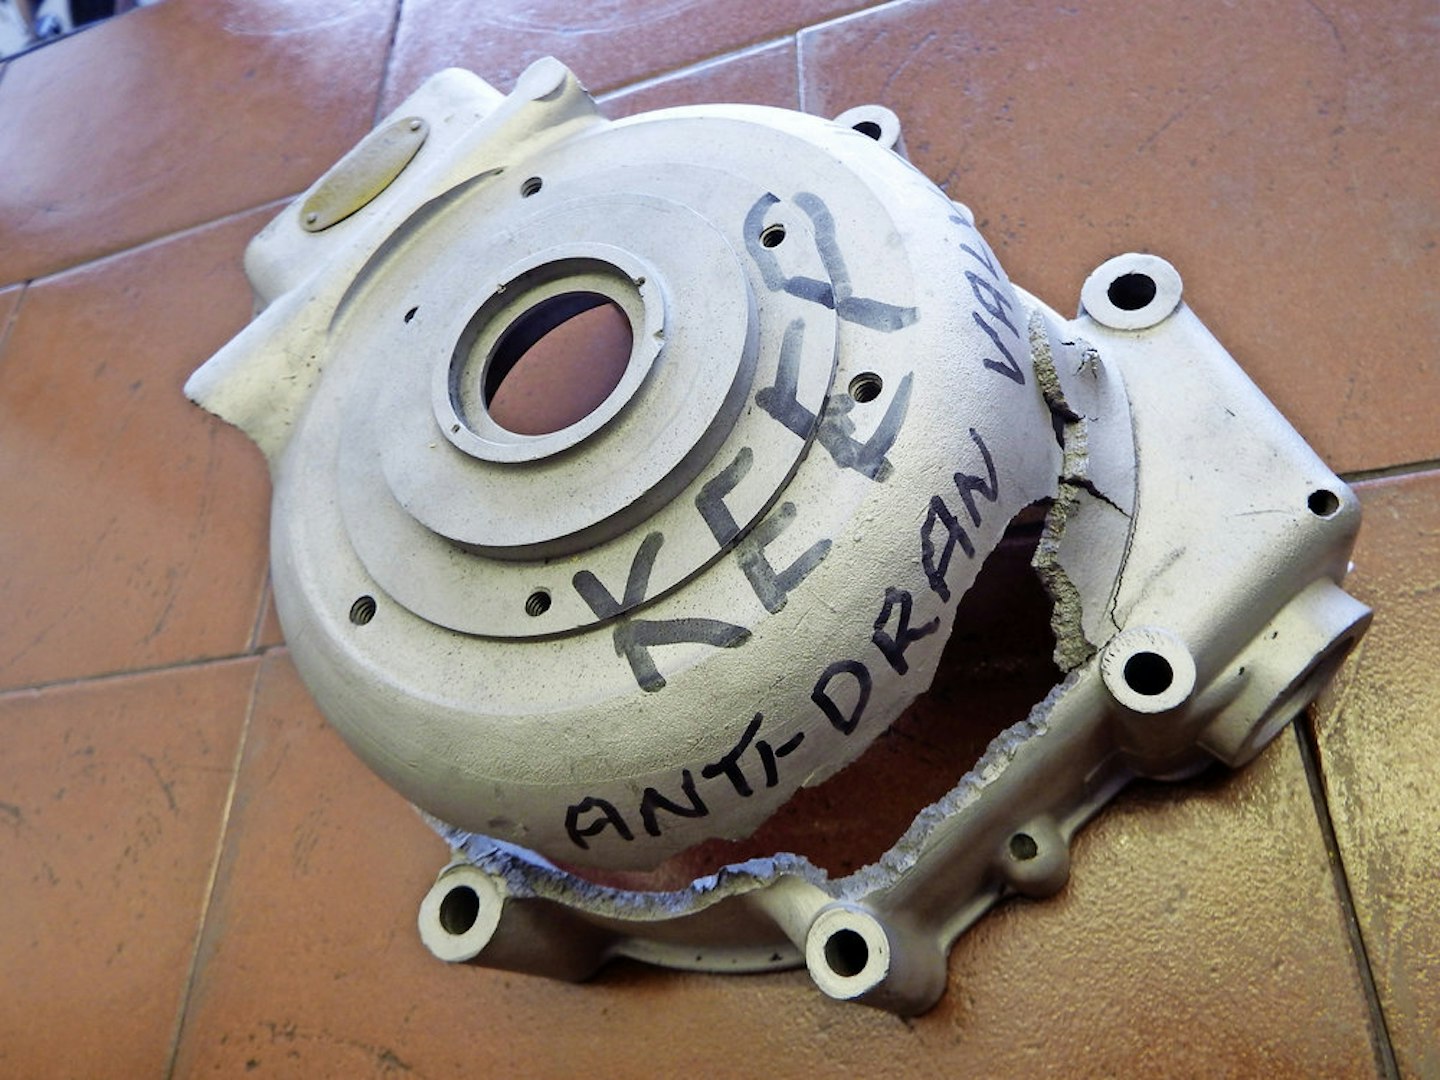
ently relieving the edge of a piston ring groove removes burrsRICK REVISITS AN ENGINE THAT LOCKED UP TEMPORARILY TO SEE IF THERE’S ANY LASTING DAMAGE – AND ENDS UP GLAD THAT HE DID
At the 2014 Manx, my 1928 350 BSA had a bit of a hard week after my ultra-reliable Triumph Trophy was laid up with a stripped tappet adjuster. Riding round the Island every day at a fair clip led to the little bike nipping up on a few occasions and although it loosened up after freewheeling for a few yards and has run fine since, even partial seizures usually have some permanent effect. So, having a bit of spare time, I decided to check it over. Lifting the head revealed the bore in perfect condition – but that’s only half the story, so I removed the cylinder to check the piston. Again all seemed well – but, suspicious by nature, I removed the piston for closer inspection.
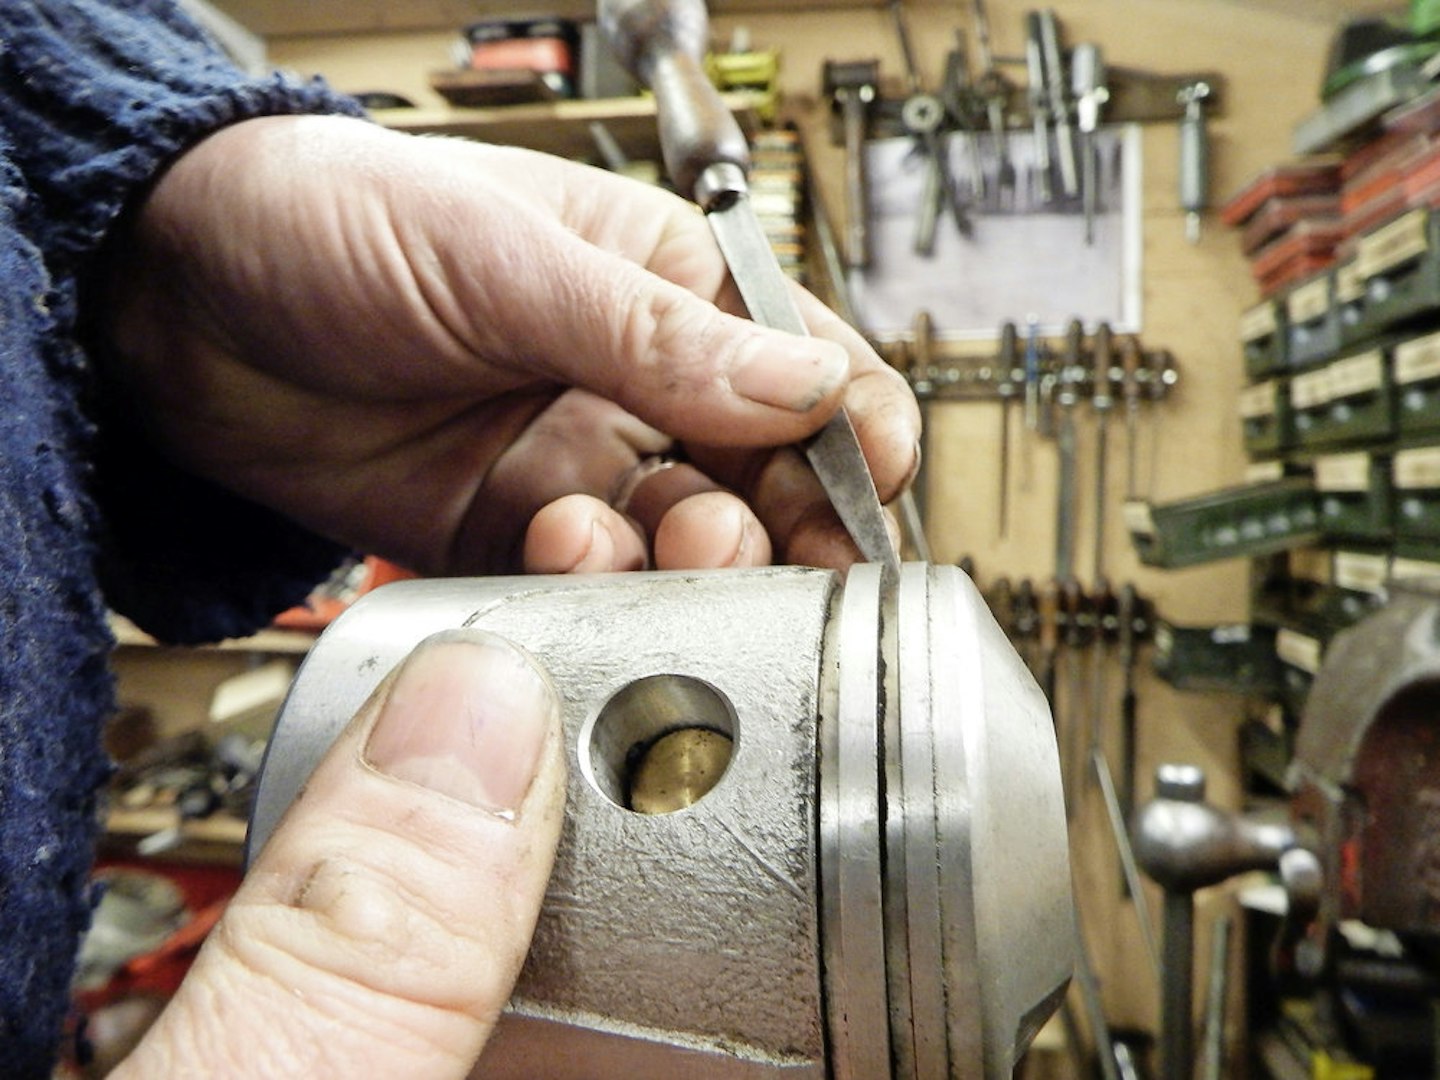
It was the right thing to do; although the top ring was free to move and rotate, it wouldn’t actually come out of its groove. Although the seizure marks on the piston were very slight, the alloy had clearly smeared just enough at the ring groove to trap the ring. This would ultimately lead to blow-by – loss of compression, pressurisation of the crankcase and possible overheating – so it was something worth discovering. The solution was carefully to wiggle the ring free and use a hand-held blade to scrape a slight bevel around the edges of the groove, removing the burr. Problem solved; but, like I say, when slight seizures occur you should always take a look, even though it seems like you’ve got away with it.